How do I send giveaway entries to Zapier?
Quick answer
In Zapier, create a Zap with Webhooks by Zapier as the trigger and Catch Hook as the event, then copy the custom webhook URL. Paste it under Setup > Integrations > Zapier Webhook in Giveaway Ninja, save and send a test. Finally, set "Export collected e-mails" to Zapier Webhook in your giveaway's SIGN-UP FORM tab.
1) Create a new Zap
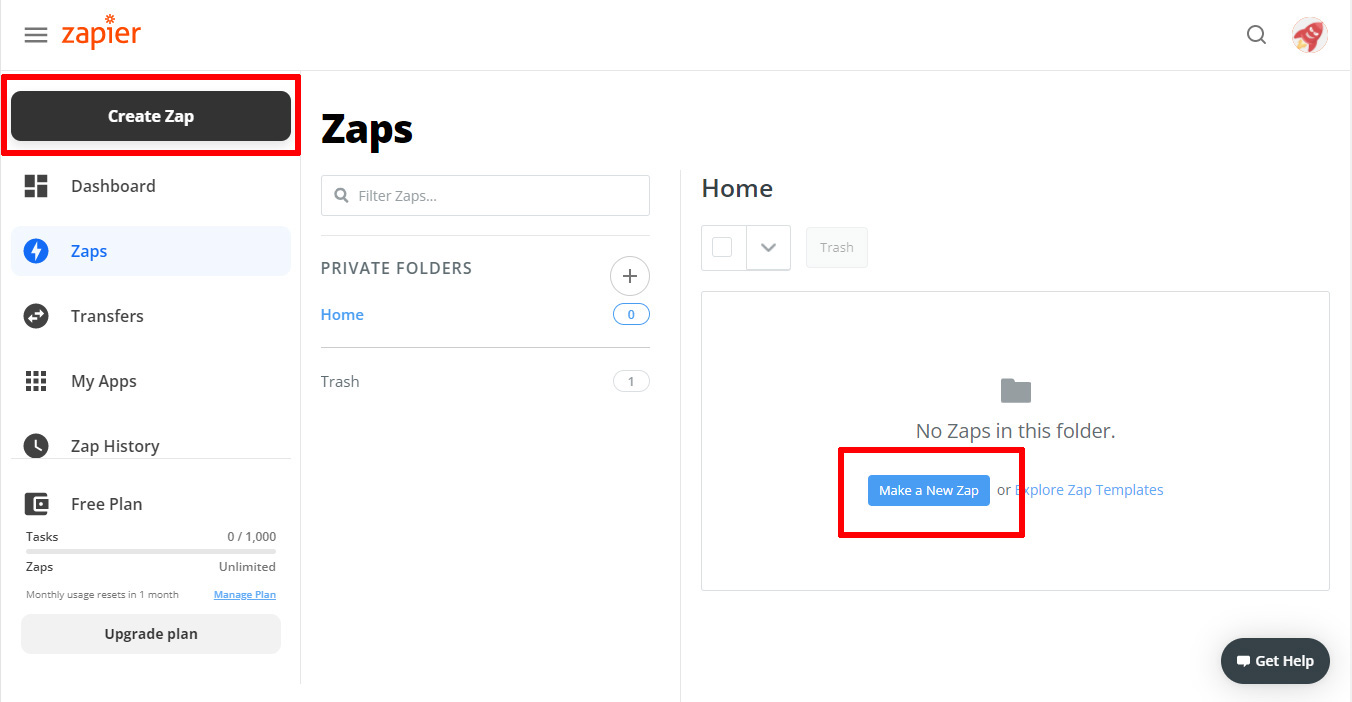
Log in to your Zapier account and click the Create Zap button.
2) Add the Webhooks by Zapier app
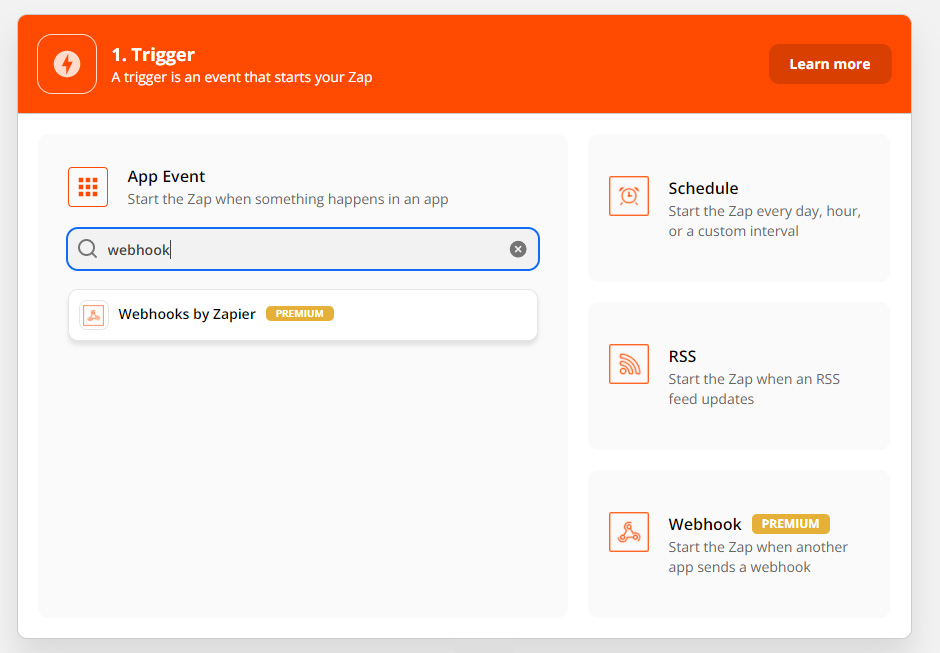
Search for Webhooks by Zapier and select it as the trigger app.
3) Set the trigger event to "Catch Hook"
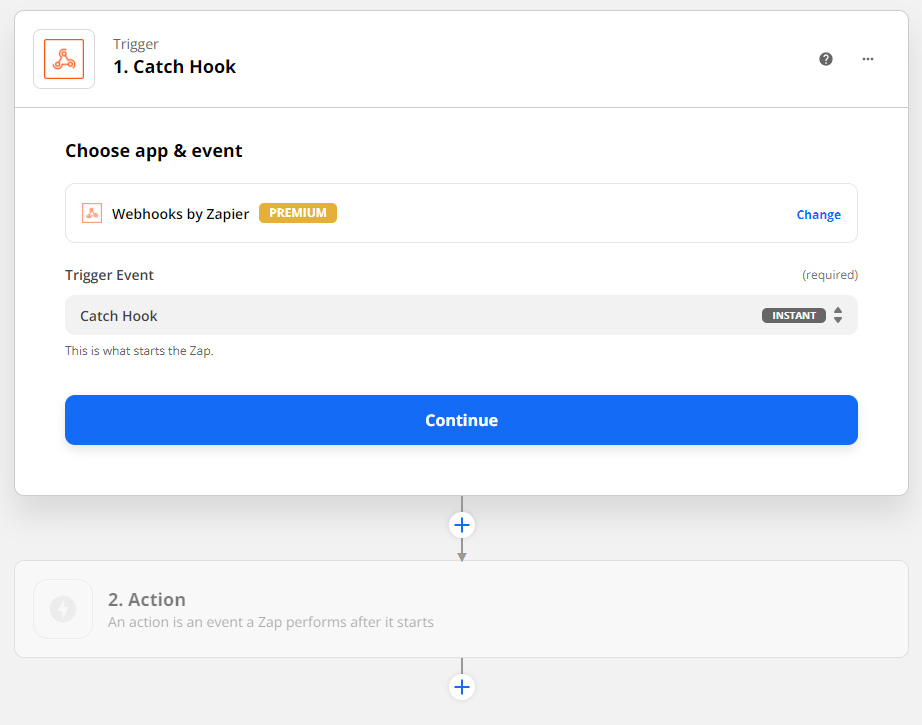
Select Catch Hook as the trigger event, then click Continue.
4) Copy the custom webhook URL
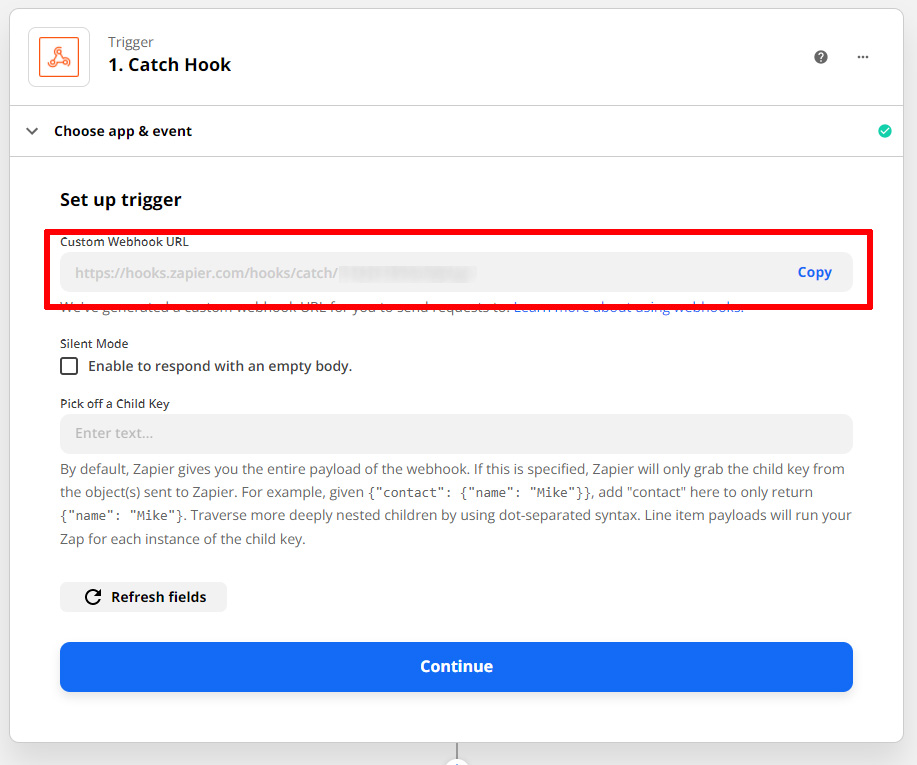
Copy your custom webhook URL and click Continue.
5) Paste the custom webhook URL
- Log in to the Giveaway Ninja dashboard
- Click Setup > Integrations > Zapier Webhook
- Paste the custom webhook URL you copied from Zapier
- Click SAVE and then SEND TEST
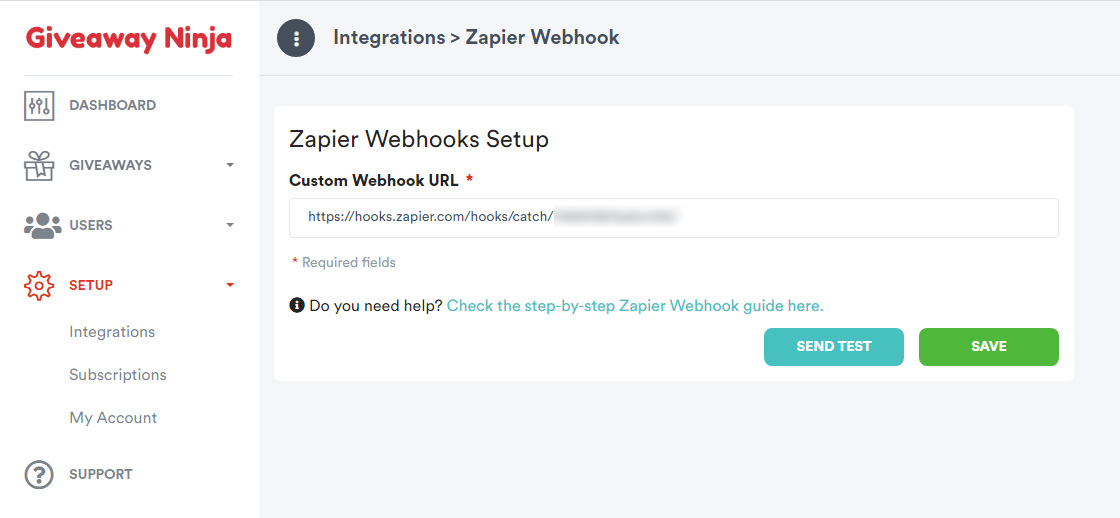
6) Test your trigger
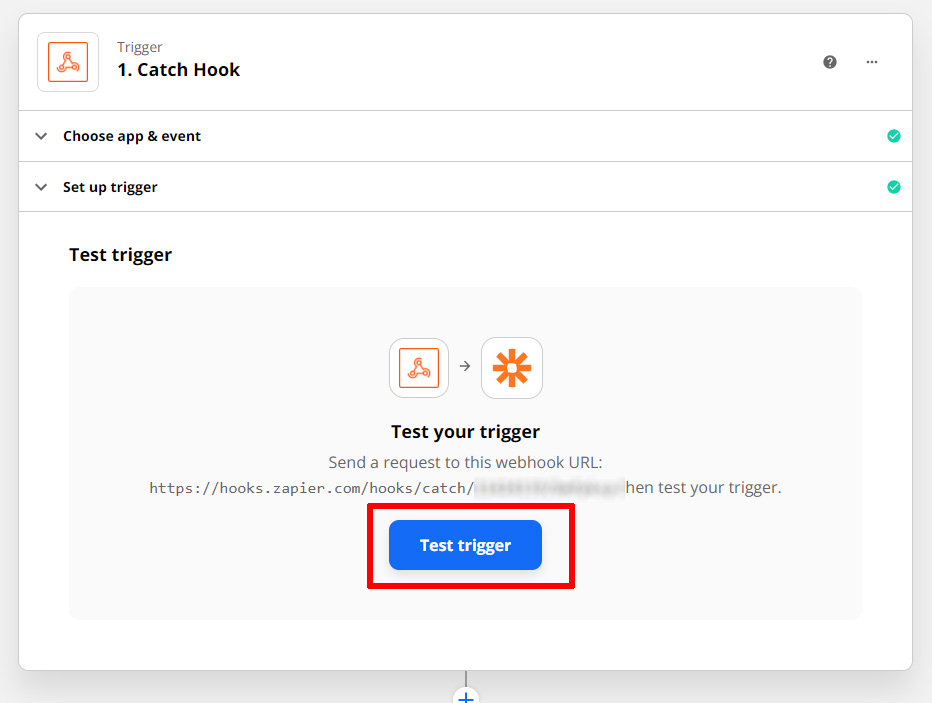
Switch to Zapier and click TEST TRIGGER.
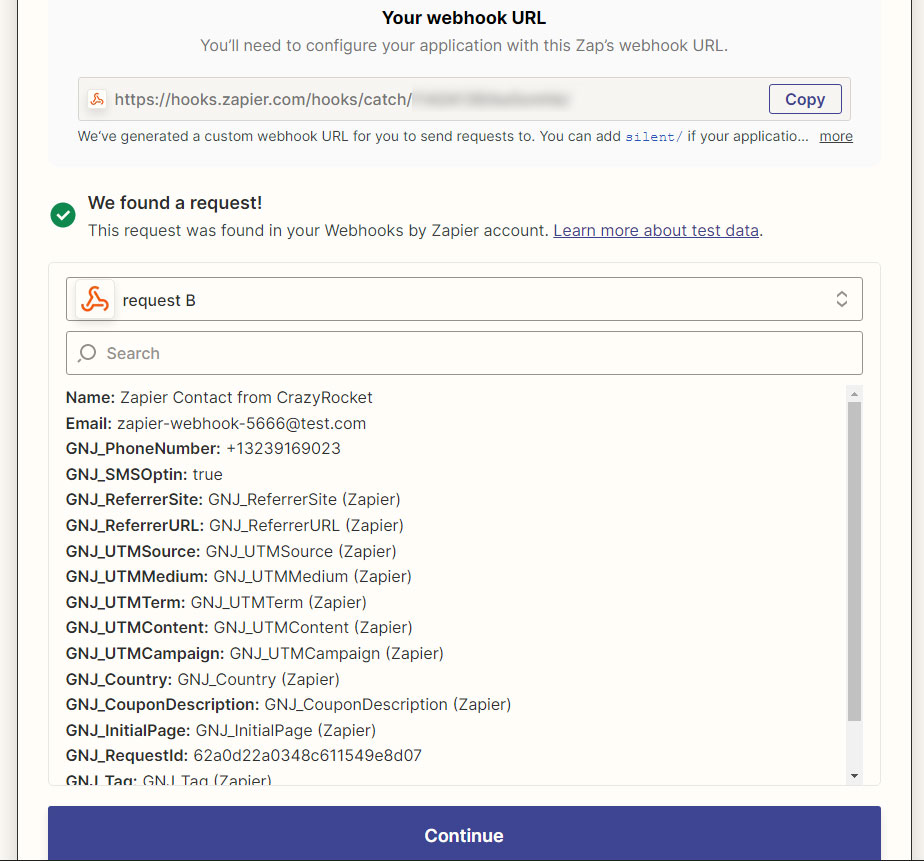
You should see the test request you sent from the Giveaway Ninja dashboard. The Name, Email and GNJ_* fields are easy to use in your action editor later.
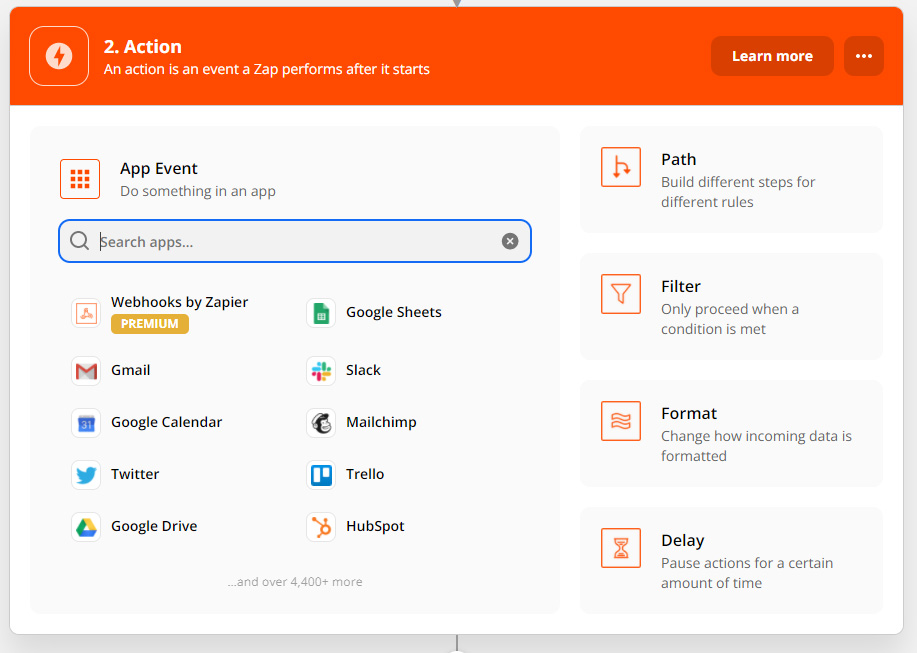
You're now ready to use the data from Giveaway Ninja. Just add the actions you want and build your Zapier automation! 😉 For a deeper custom integration, use the Giveaway Ninja API.
7) Enable the Zapier webhook integration
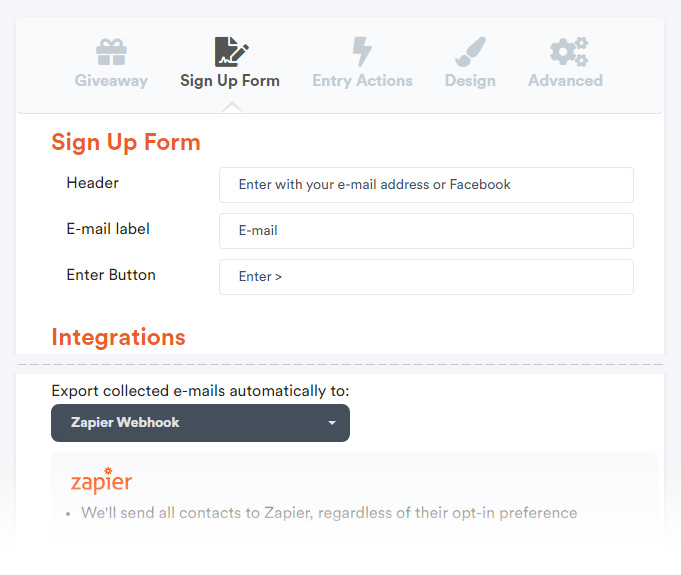
Edit your giveaway, switch to the SIGN-UP FORM tab, scroll to the Integration section, and set the "Export collected e-mails" dropdown to Zapier Webhook.
Done
Great! Zapier now receives every email collected by Giveaway Ninja.
Planning what to send entrants? Follow the campaign email sequence.
People also ask
What data does the webhook send?
The entrant's name, email and the GNJ fields, such as country, referrer and UTM values. They're available as fields in your Zap's actions. See how to connect Giveaway Ninja to Klaviyo for what each GNJ field holds.
Zapier doesn't show my test. What should I do?
Click SAVE and SEND TEST in Giveaway Ninja first, then TEST TRIGGER in Zapier. For anything the webhook can't do, see how to use the Giveaway Ninja API.
Can I build a custom integration without Zapier?
Yes, with the REST API and your Private API key. See how to use the Giveaway Ninja API.
Still stuck?
Our support team is available 24/7 and always replies. Send us a message and we'll help you sort it out.